

Nine tools let the Bambu H3C swap colors in six seconds

The Bambu H3C swaps colors in about six to seven seconds against up to 40 seconds on the H2C, because its nine tools are already loaded and preheated. It also prints soft 75A TPU better than any rival you can buy. Still, every change primes about 50 mg of filament, and the AMS 3H dries just two of nine spools.
Key Takeaways
- Tool changes take about six seconds, so heavy multicolor prints finish far sooner.
- Very soft 75A TPU prints fast and clean, which no rival printer matches.
- It still wastes filament: a 4,000-change mask dumps about 200 g into the tower.
- Only two of the nine spools can be dried, the biggest letdown on the machine.
- With the AMS on top it stands about a meter tall, so plan a low stand.
What is the Bambu H3C?
The H3C is Bambu Lab’s first third-generation desktop printer and its first machine designed around a tool changer. It ships as the H3C AMS Combo for $2,499 in the US and €2,499 in the EU. That is $300 more than the H2C, which Bambu keeps selling, and it makes the H3C the priciest non-Pro printer in the range.
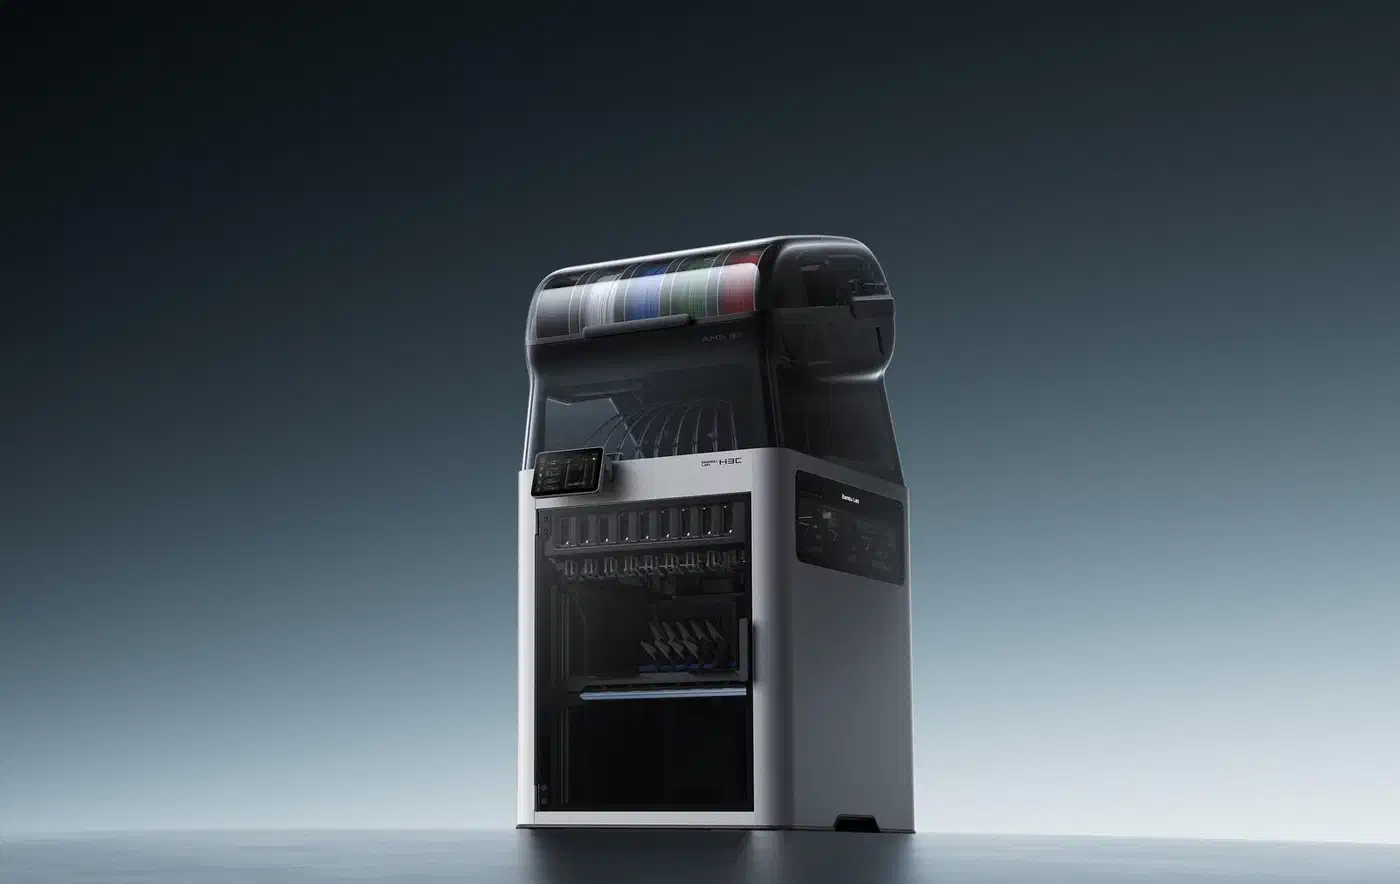
Bambu’s early patent drawings showed ten tool heads, nine in a rack and one on the carriage, but the shipping printer has nine tools in total.
| Spec | H3C |
|---|---|
| Build volume | 330 × 320 × 325 mm |
| Tools | 9 |
| Tool change | 6 s |
| Max speed | 1,400 mm/s |
| Acceleration | 25,000 mm/s² |
| Hotend | 350°C |
| Bed | 120°C |
| Chamber | 65°C |
| AMS 3H | 9 spools |
| Dryer | 85°C, 2 slots |
| Nozzles | 0.2-0.8 mm |
| Storage | 64 GB |
| Network | Wi-Fi |
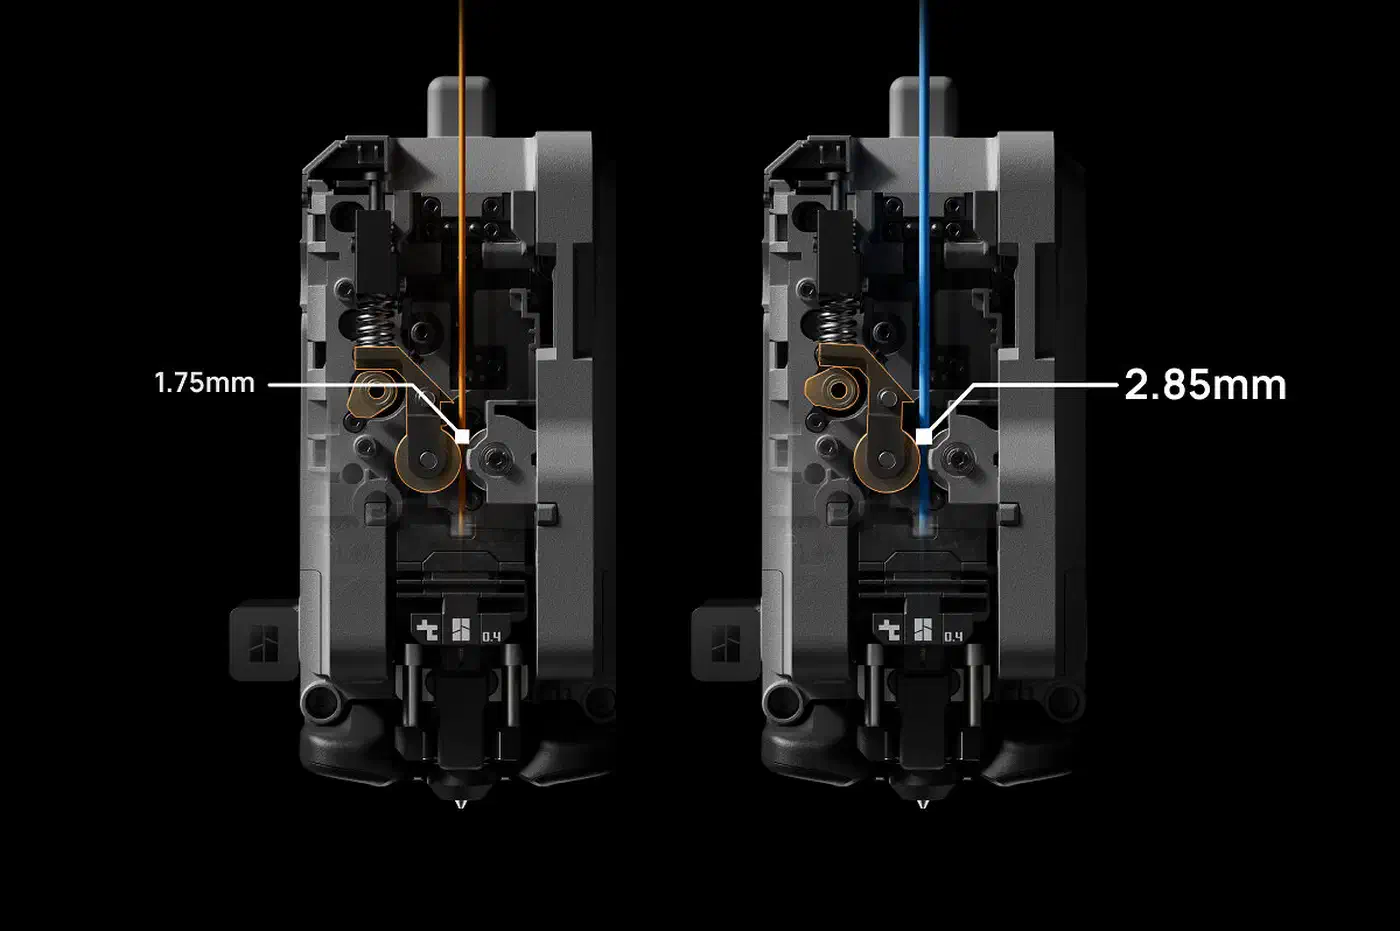
Out of the box you get eight 0.4 mm tools for 1.75 mm filament. The ninth, tool 8, is a 0.4 mm tool for 2.85 mm filament. Every nozzle is hardened steel rated at HRC 55 or harder, so carbon and glass fiber blends are fair game.
The printer body measures 493 × 571 × 587 mm. With the AMS 3H on top, the stack gains 460 mm of height, and Bambu asks for 1.3 m of clearance with the lid open.
Swaptek tool changing: the best part of the machine
With Swaptek, one main extruder in the print head picks up whichever of the nine tools it needs. Each tool carries its own hotend, heater and loaded filament, so nothing ever retracts back to the AMS. The head then pulls the tool into a cone, which locks it in a repeatable position.
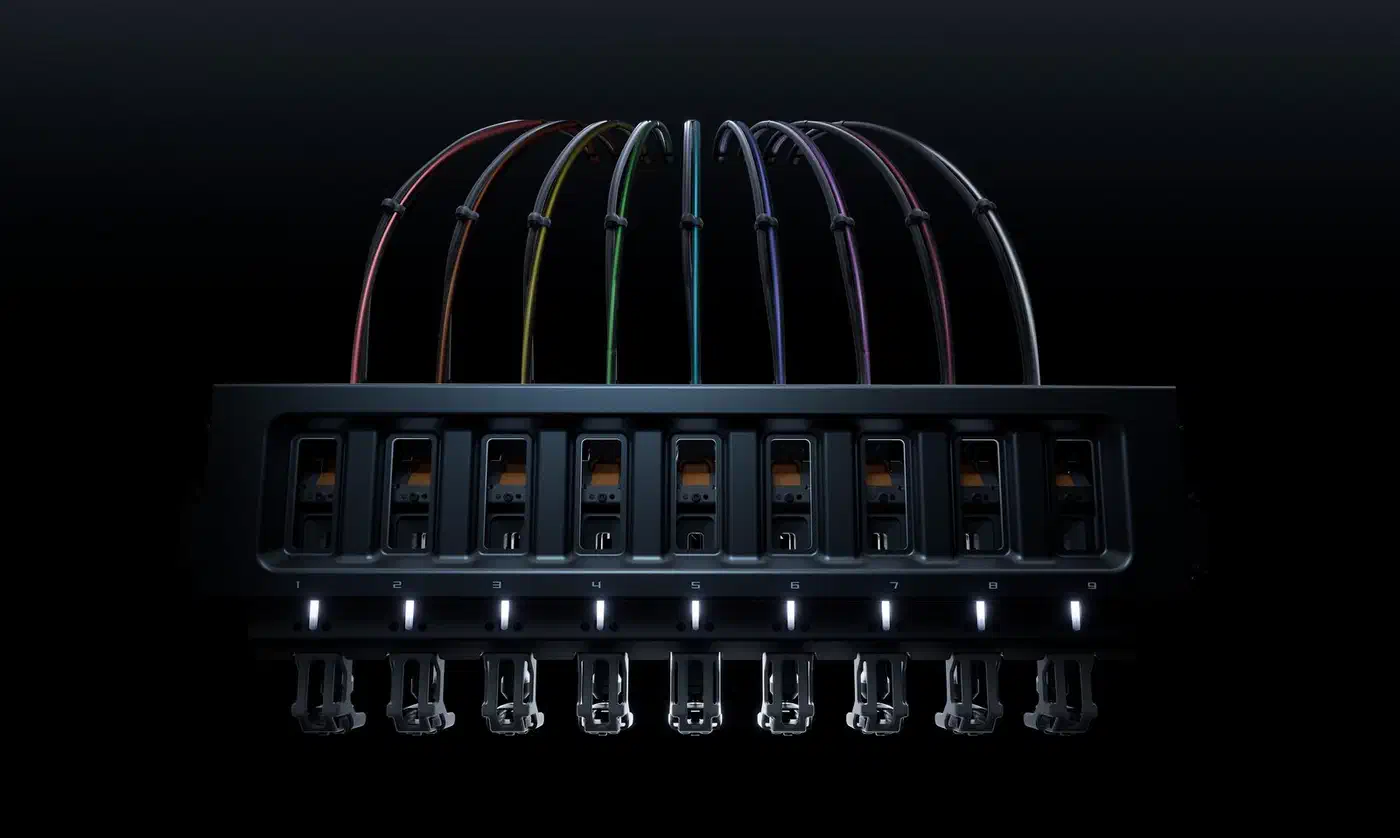
The tools also heat while parked. Active Pre-Heat reads the upcoming G-code and warms the next tool while the current one finishes. A status LED on each tool turns from white to orange as it heats. Parked tools get hot enough to burn a reaching hand, and the light shows which ones are hot.
In practice, a change takes about 6 to 7 seconds print-to-print when the incoming tool only primes. It takes a little over 10 seconds when that tool also prints the prime tower’s outer wall. By contrast, the H2C’s nozzle swap could take 30 to 40 seconds, because filament had to retract all the way to the AMS.
What Swaptek gets right
- Lighter head: only the active tool rides on the carriage, unlike the H2D’s dual-nozzle head, so it moves faster.
- Full bed reach: every tool reaches the whole build area, with no lost strips at the sides as on the H2C.
- Retractable rack: it drops for each change and lifts during printing, keeping tubes and wires out of the way.
- Self-calibration: docking positions set themselves at setup, and an eddy-current sensor at the back of the bed measures nozzle offsets before every print. Colors line up cleanly.
- Cutters on board: each tool has its own filament cutter, worked by a lever on the head.
Where Swaptek falls short
The rack still blocks part of the view of the bed. The best view of a print comes through the AMS side windows instead. The gantry also moves fast enough to hurt fingers left near it.
How much filament does the H3C waste per color change?
The H3C isn’t waste-free. Skip the prime tower and parts come out with gaps at the start of each color section. The gaps are worst on small color patches, because a tool barely extrudes on those layers.
Priming is still needed. A parked tool holds molten filament hot for minutes, which can degrade it, and a freshly picked-up tool has to rebuild pressure in its hotend before it prints.
By default the H3C primes about 15 mm of filament per change, roughly 50 mg. A detailed full-color mask with over 4,000 changes puts almost 200 g into the tower, while the mask itself weighs a little over twice that.
| Tool changer | Prime per change | Waste at 4,000 changes |
|---|---|---|
| Bambu H3C | 50 mg | 200 g |
| Prusa CORE One INDX | 10 mg | 40 g |
The Bondtech INDX on the Prusa CORE One primes at the side of the bed rather than on a tower.
A single-nozzle printer with an AMS wastes far more. For a many-change wreath at 0.12 mm layers, the slicer’s estimates put the H3C almost 8 hours faster and 70 g lighter.
Bambu’s default prime volume is also cautious. Prints came out clean at 17 mm³, about half the default. Lower it in steps and inspect each result.
Extra AMS units all feed tool 1 through an add-on buffer, and that tool goes back to the cut, retract, reload and purge cycle of a classic AMS printer, with the waste that comes with it.
FlexFeed and 2.85 mm TPU: the feature nobody else has
FlexFeed extruder gears adjust their grip on the fly for 1.75 mm or 2.85 mm filament. As a result, one print can switch between rigid PLA and very soft TPU without help.
Thin, soft TPU buckles and stretches inside the extruder. Thicker filament gives the gears something firm to push, and Bambu claims up to three times the flow of a classic printer on 75A TPU.
Very soft TPU prints faster than some printers print PLA. Even Shore 60A TPU, about the softest you can buy off the shelf, extruded cleanly at 10 mm³/s.
Switching to flexibles is also quick. Every AMS slot has a direct bypass port for flexible filament, and each tool has a holder to park its Bowden tube. Going from rigid to flexible mostly means unplugging one Bowden tube.
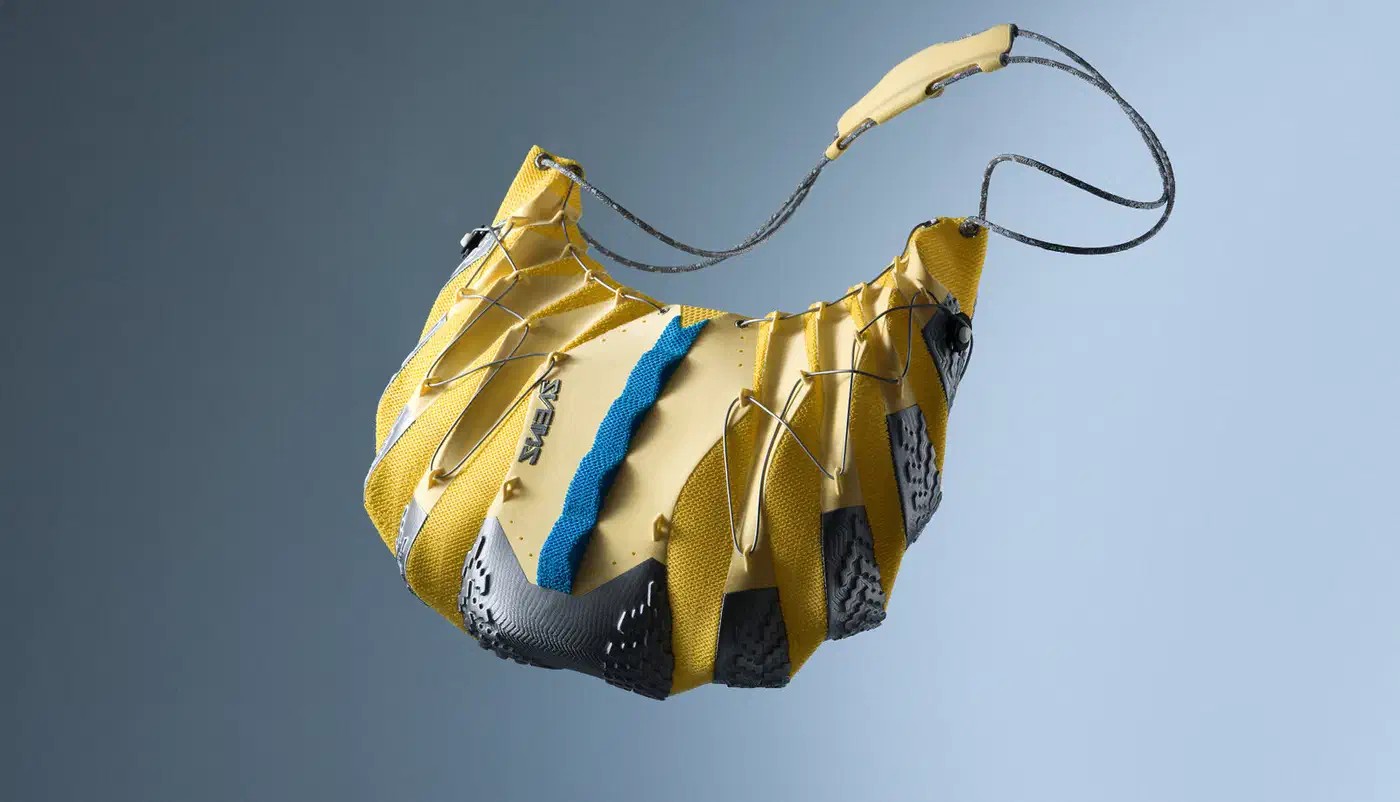
Prints that mix these materials include:
- Vacuum-cleaner wheel: a PETG hub with a 75A TPU tread.
- Poseable dragon bust: PLA, 98A TPU and 75A TPU, where the TPU joints double as non-stick support.
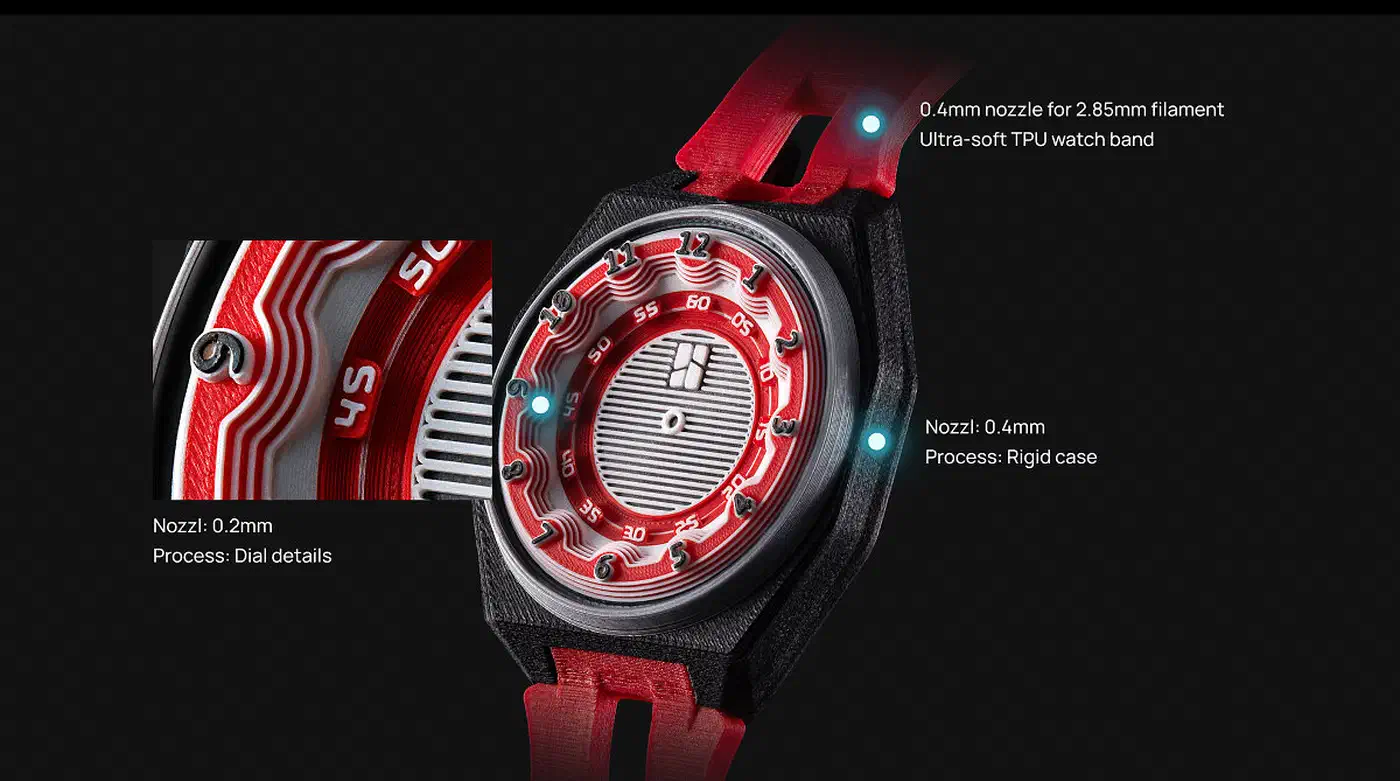
- Watch: a TPU strap plus 0.2 mm detail tools for the face.
- Shoe: 75A TPU with 98A accents and PLA supports, about two days to print.
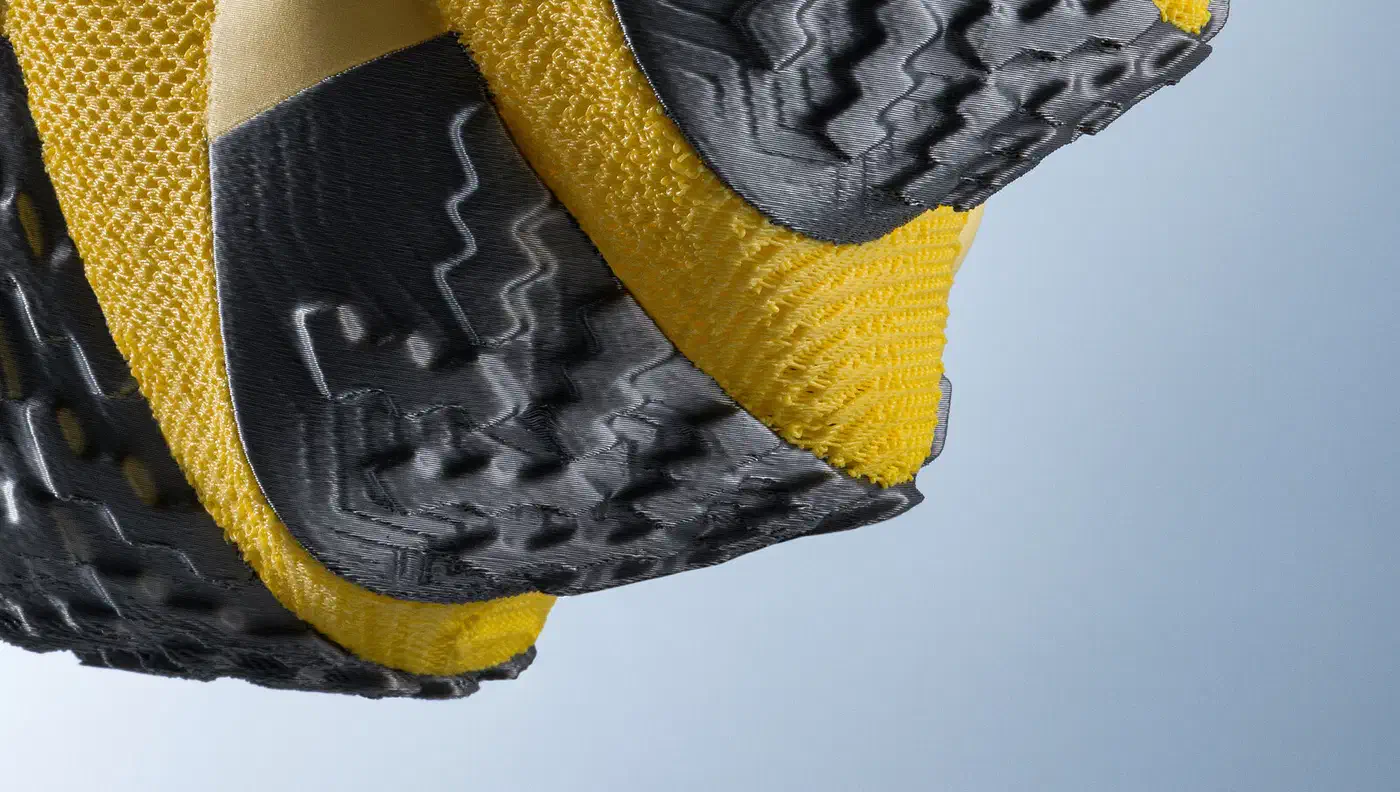
Harder grades are simpler still: Shore 68D TPU feeds through an AMS without jamming.
Where FlexFeed falls short
- Tool 8 is the 2.85 mm tool. Most buyers want nine 1.75 mm colors, so they must buy a separate 1.75 mm tool. You can’t just swap the nozzle, because the two hotend types don’t cross over. The 2.85 mm tool should have been an optional extra.
- Tool 8 feeds from a rear slot. Threading TPU through its bypass is done half blind. Use slot 1 or 9 for flexibles instead, where the side panels come off and the path is visible.
- Sticky spools can unthread. On a full 98A spool, tension can pull filament out of the melt zone while the tool is parked. The printer caught it each time and paused rather than failing the print.
- Hot chambers jam soft TPU. 75A TPU jammed when paired with ASA, so pair it with PETG or PLA and a cool chamber.
AMS 3H: sealed and tidy, with a two-spool dryer
The AMS 3H is built into the printer. It forms the top cover, and the tools connect to it directly. Nine spools, five at the front and four at the rear, share one sealed lid that holds itself open.
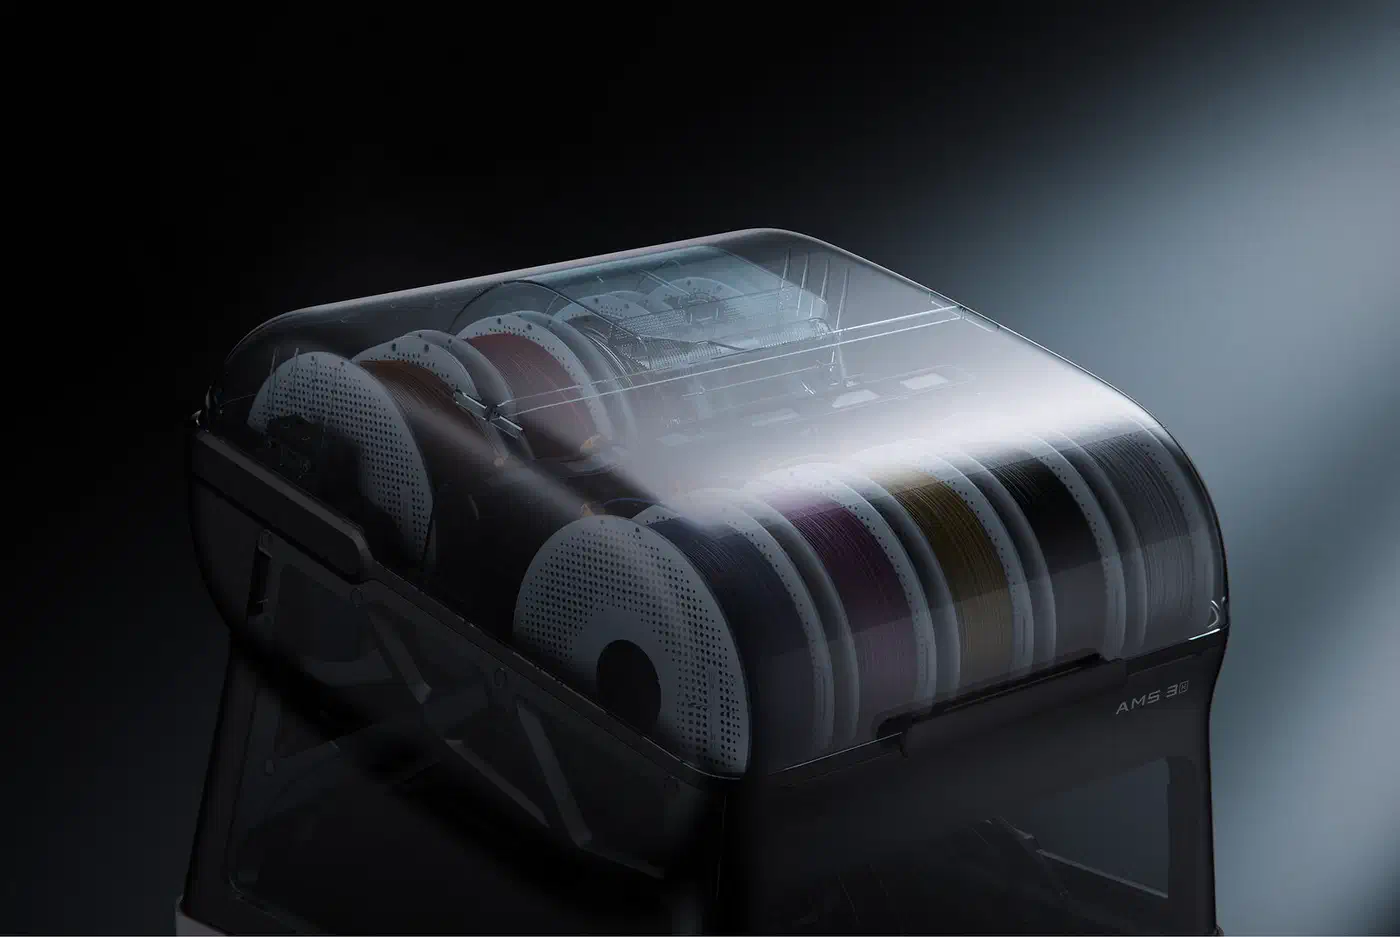
Loading takes one hand: push filament into the funnel and a central actuator grabs it. RFID reads Bambu spools, and there’s no per-tool loading routine before slicing. Remaining-filament estimates work for third-party spools once you enter them, and automatic backup hands over to a matching spool when one runs out. Unloading all nine tools takes about a minute.
Drying is the machine’s weakest part. Only two of the nine spools can be dried, in rear slots 6 and 8, at up to 85°C. The AMS also draws its own power, up to 200 W, through a second power cord. You can dry nylon while printing PLA, but you can’t dry all nine spools before a big job. The drying bay isn’t fully sealed off from the rest either, so drying ABS there means pulling the PLA out of the AMS.
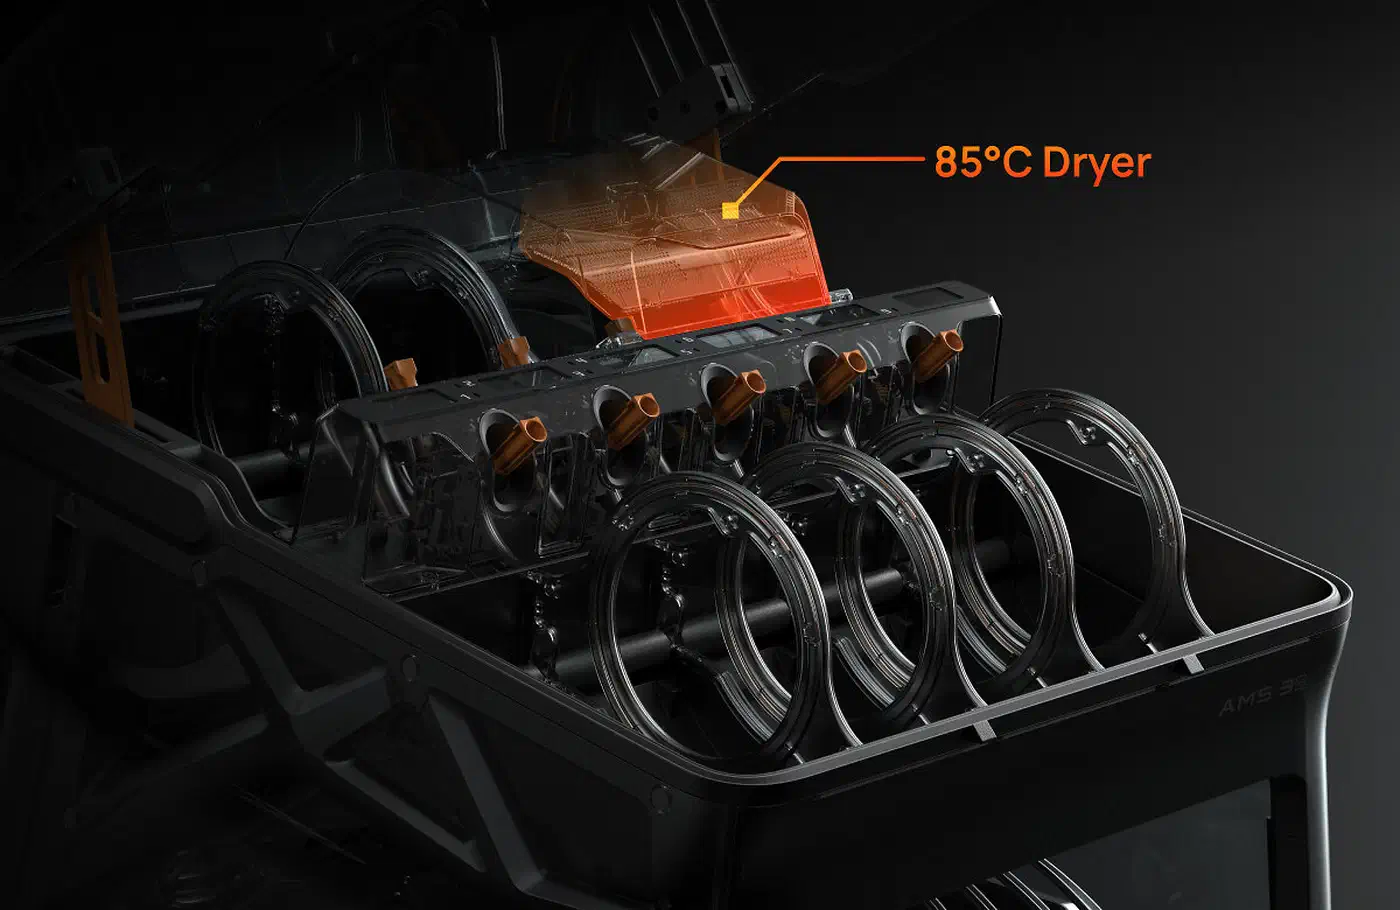
Wet nylon needs 75°C to 85°C to dry. For the other seven slots, the AMS 3H has no active dehumidification. Two hygrometers report humidity, and the printer often warns that the spools are too wet. The bundled desiccant bags saturate quickly and can’t be dried in place, though the right side of the rear row has room for a large silica bag.
Spool changes are clumsy. One central feeder replaces per-slot motors, so the AMS can’t retract, and filament is left loaded in each tool after a print. Changing a spool means unloading first, then pulling almost a meter of filament out by hand and rewinding it. An option to auto-cut after each print would fix most of this.
The AMS power cord matches the printer’s in length but starts about 86 cm (34 inches) up the machine, so budget for a longer one.
For expansion, a buffer on the back links up to four extra AMS units to tool 1, for 24 materials in total.
How tall is the Bambu H3C, and where should it go?
The H3C stands about 102 cm (40 inches) tall with the AMS closed, and taller with the lid up.
On a standard 94 cm worktop, a person of average height (about 175 cm, or 5'9") struggles to reach the four rear spools. Even at 84 cm it’s a stretch, and the slot numbers in the middle are hard to read from the front.
Bambu sells the Bambu Station to fix this. It’s a low pedestal with storage for tools, spare filament and accessories, and it brings the AMS to a comfortable height. Otherwise, use the lowest bench you have.
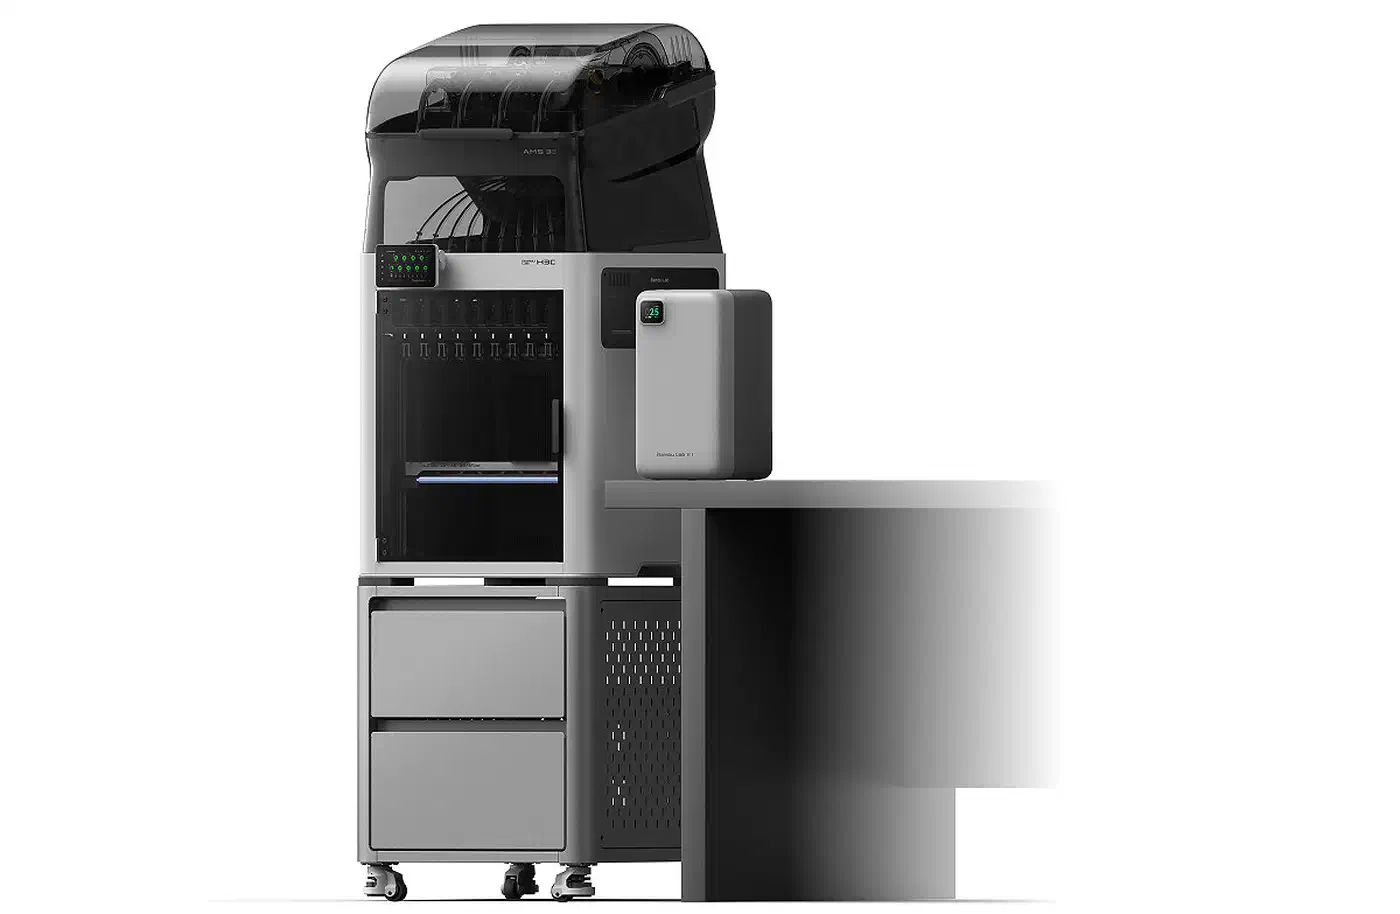
Magnetic side windows on the AMS riser make maintenance easy. The front panel clips on instead, though it should have been magnetic too.
Print quality, speed and power draw
Print quality is excellent. Multicolor prints line up cleanly, with only slight stringing in spots. Calibration and torture tests pass, and 0.2 mm clearance pins come loose. ABS helmet parts came out clean despite the tall chamber, and their supports broke away easily.
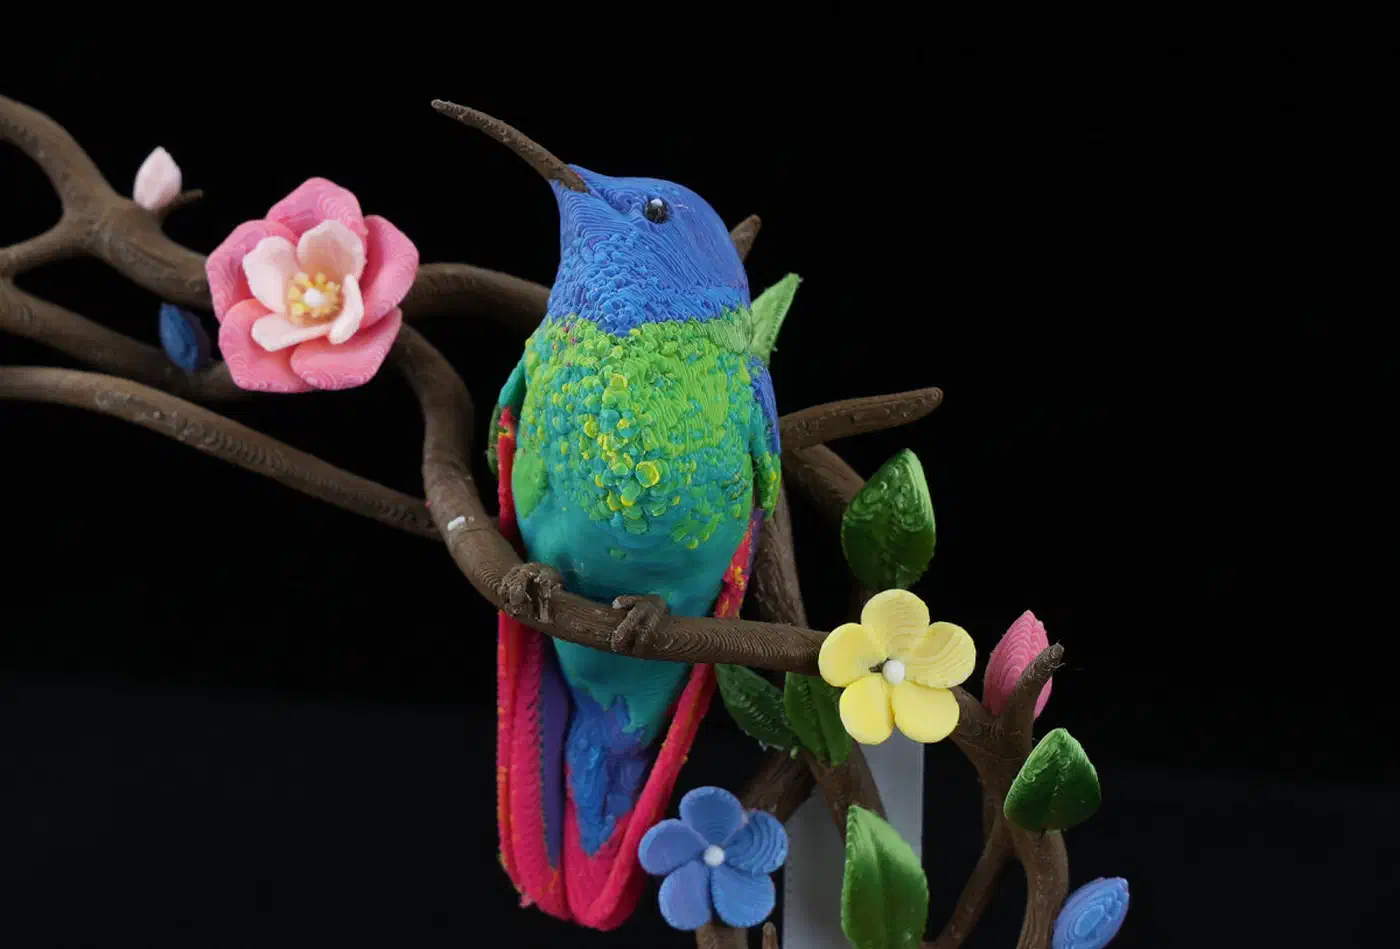
The standard profiles look tuned a little too fast. They leave faint speed lines where speed changes sharply, a hint of under-extrusion on top surfaces, and a slight salmon-skin texture on smooth PETG. The High Quality profile fixes most of it.
Speed gains are modest. Travel acceleration is up about 150% and travel speed about 40% over the H2C and H2D. However, most prints are limited by how fast plastic melts, so the gain in practice is usually about 10%. Print times ran about 5% over the slicer’s estimates.
As support interfaces, PLA under PETG and HIPS under ABS or ASA break away cleanly, and with six-second changes they add little time.
| Mode | Power at the plug |
|---|---|
| Idle | 20 W |
| Power saving | 14 W |
| PLA | 175 W |
| PETG | 190-200 W |
| ABS/ASA | 350 W |
| Chamber heat-up peak | 1,600 W |
| TPU, 35°C bed | 100 W |
Air handling is back to HEPA plus activated carbon, for both recirculation and exhaust. It doesn’t remove ABS smell entirely, and particle spikes show up mostly during purges. The optional E1 air purifier costs $199 and starts filtering when a print begins.
Under the skin, a sheet-metal frame replaces the H2 series’ casting, and twin rods replace a linear rail.
Full-color CMYKW printing and mixed nozzle sizes
Fast changes make full-color printing practical. Five tools loaded with cyan, magenta, yellow, black and white stack thin layers to fake new colors, much like an inkjet. Seven dragons in one print reached 16 distinct colors from those five filaments.
Bambu’s PLA Palette suits this job. It pairs four opaque bases (cyan, magenta, yellow, white) with a translucent black, and the opaque bases claim under 1% light transmission at a 2 mm wall.
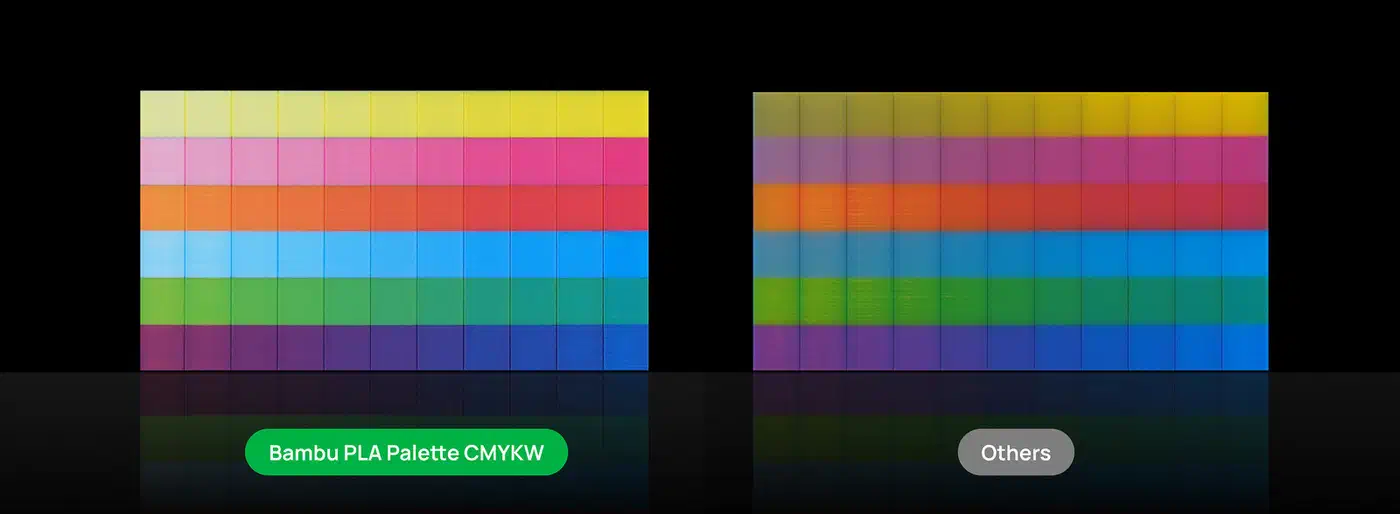
Mixed colors shift with viewing angle and look almost iridescent, while tops and bottoms show only the surface layer’s color. Finer layers reduce the effect. Dithering suits textures like lizard skin more than flat surfaces, and a 1,400-change test model is more proof of concept than a practical part.
Nine separate tools also allow mixed nozzle sizes in one print. You assign 0.2 mm tools to detail and 0.4 or 0.6 mm tools to bulk, and the slicer merges the fine layers for the bigger nozzle. The same color on two nozzle sizes does need two spools. Bambu plans to bring the feature to the H2D and other multi-nozzle machines.
Two weaker spots remain:
- Screwed-in nozzles: each hotend is held in its tool by three screws, and the tool comes out through an AMS side window. That’s a step back from Bambu’s quick-swap hotends. The hotends carry no chip, though, which should make third-party parts easier.
- Slow painting tools: the slicer’s coloring tools haven’t kept up. Painting a model for multicolor is still slow, with no mirror, smoothing, threshold fill or image projection.
Cutting, plotting, debossing and foil-transfer heads are planned for Swaptek, though a laser head is not.
Bambu H3C vs H2C, H2D, Snapmaker U1 and Prusa CORE One INDX
| Printer | Price | Materials | Soft TPU |
|---|---|---|---|
| Bambu H3C | $2,499 | 9 | ✅ |
| Bambu H2C | $2,199 | 7 | |
| Bambu H2D | $1,500 | 2 | |
| Bambu X2D | $649 | 2 | |
| Snapmaker U1 | $750 | 4 | |
| Prusa CORE One INDX | $2,369 | 8 |
The INDX price is for the 8-tool version with camera and filter.
The H3C makes the H2C hard to recommend. The H2C only makes sense for frequent nozzle-size swaps with few materials. Matching the H3C by adding a second AMS and an AMS HT to an H2C costs more than the H3C itself.
The H2D is the better buy if you need two materials, such as breakaway supports, even with engineering polymers. The X2D brings dual nozzles to an even lower price, and three of them cost about the same as one H3C.
The Snapmaker U1 is fine for four-color PLA at about a third of the price. However, it’s weak on very soft TPU and high-temperature polymers.
The Prusa CORE One INDX matches or sometimes beats the H3C on print quality. Its software and firmware are far less polished, though, so the H3C wins on overall experience. The INDX vs KliTek vs AMS comparison covers the other ways to print in color.
Joris Peels at 3DPrint.com thinks the H3C’s complexity is deliberate, a way for Bambu to move upmarket where cheaper rivals can’t follow. He also doubts it beats buying several cheap printers:
I don’t know how many people will get this over a few P2S printers, though.
Several cheaper printers make more sense for a print farm than for a home user. Buy the H3C if you print detailed multicolor or multi-material parts, especially with soft TPU. Skip it if you need two materials or fewer, or a bigger bed, since the H2S and H2D are wider.
Small things owners notice in week one
- Build plates: H3C plates have shorter front tabs to clear the tool rack, so H2S and H2D plates don’t fit. Check before buying spares.
- Screen: the same size on a new arm. It tilts up but not down, which is awkward for rack mounting, and the USB port is on the left of the hinge.
- Storage: 64 GB built in, so timelapses and reprints no longer need a USB drive.
- Network: Wi-Fi only, with no Ethernet at this price. Cloud, LAN-only and fully offline modes all work, and OrcaSlicer runs through the Connect plugin.
- Camera: the chamber camera now sees the whole bed.
- Setup: it arrives in two boxes. The AMS mount is awkward and the paper guide is thin, so follow Bambu’s online setup guide. A separate AMS cable still hangs out the back.
- Damping feet: the printer wobbles visibly on its feet. That’s normal, and prints are unaffected.
- Early sensor fault: one early unit’s eddy-current sensor had bridged wires, fixed by separating them with Bambu’s guide.