

A DPI flag decides whether your Windows 11 apps look sharp

Windows 11 blurry apps come from a flag the program sets when it starts. Every Win32 window runs in one of three DPI awareness modes, and the app picks its own. A 4K panel cannot sharpen software that has declared itself 96 DPI.
Key Takeaways
- Scaling is the app’s own decision, made at launch.
- A DPI-unaware app draws at 96 DPI and Windows stretches the result.
- System-aware apps look right on one screen and wrong on every other one.
- The “fix blurry apps” setting is only a patch over the flag.
- Match your monitors’ scale factors and most of this goes away.
What are the three DPI awareness modes in Windows?
By default, as the high DPI desktop application guide puts it, the system treats a desktop application as DPI unaware and bitmap-stretches its windows.
DPI unaware apps render at a fixed 96 DPI, which is 100 percent. On any screen above that density, Windows stretches the finished bitmap up to the right physical size. The pixels were never drawn at the higher density, so the result looks soft.
System DPI aware apps get one DPI value, usually the primary display’s value at sign-in, and they lay out their whole interface around it. They stay crisp on that one screen. Move the window anywhere else and Windows falls back to stretching.
Per-monitor DPI aware apps, in the v1 and v2 flavours, are the only ones that redraw on a panel of different density. Windows sends the app a message and lets it resize itself. Per-monitor v2 goes further and scales the non-client area too. Title bars, scroll bars, standard dialogs and theme-drawn checkboxes come out right without the developer touching them. That automatic help only reaches apps that opted into v2.
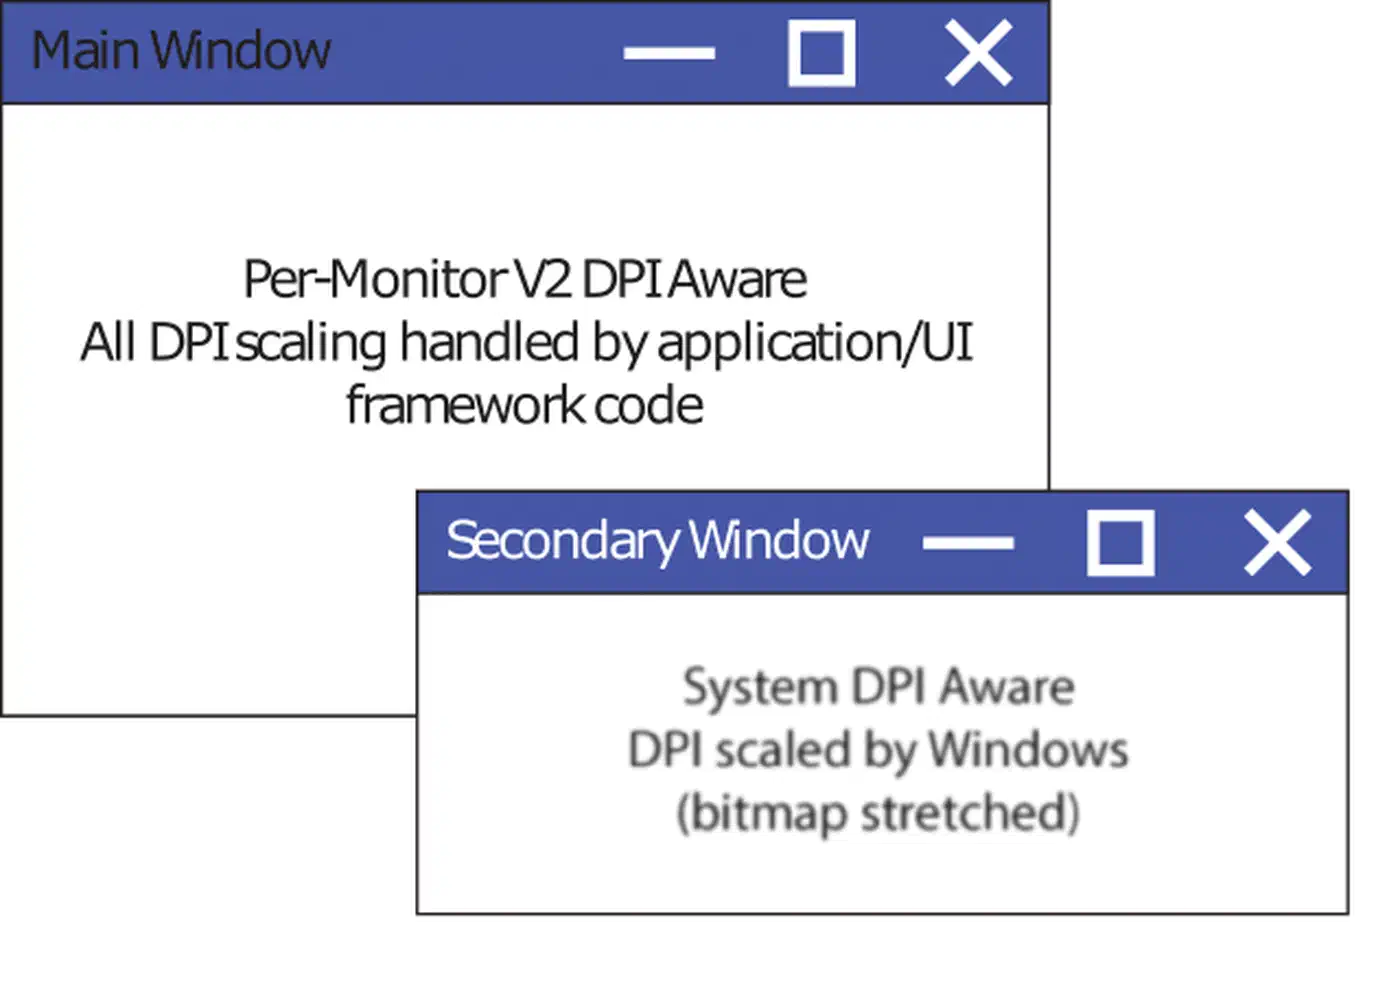
The app declares its mode at launch, usually in its manifest, and nothing about your hardware changes that. Microsoft frames the whole problem the same way: 300 DPI-class displays are ordinary now, while the desktop stack was built around 96.
What Windows 11 blurry apps look like on a mixed-DPI desk
Jamie Balfour’s write-up on why Windows scaling still disappoints describes the everyday version: a laptop panel runs at 150 to 200 percent, and an external monitor next to it runs at something else.
The usual symptoms:
- Text that is soft rather than wrong-sized, as if someone nudged a photo up in size.
- The same app looking sharp one moment and soft the next, depending on where it was opened and how it got there.
- Clipped labels and misaligned controls, showing up most at 125 and 150 percent.
- Old toolkits behaving worst of all. Java Swing is the classic example, with absolute positioning and cached font metrics that fight the runtime.
Dragging a window from one screen to the other and back is the reliable way to reproduce it. A system-aware app goes soft the moment it lands on the second panel and sharpens again when it comes home. A DPI-unaware app stays soft everywhere, because 96 DPI is all it ever drew.
How to find and override an app’s DPI mode
Open Task Manager’s DPI awareness column
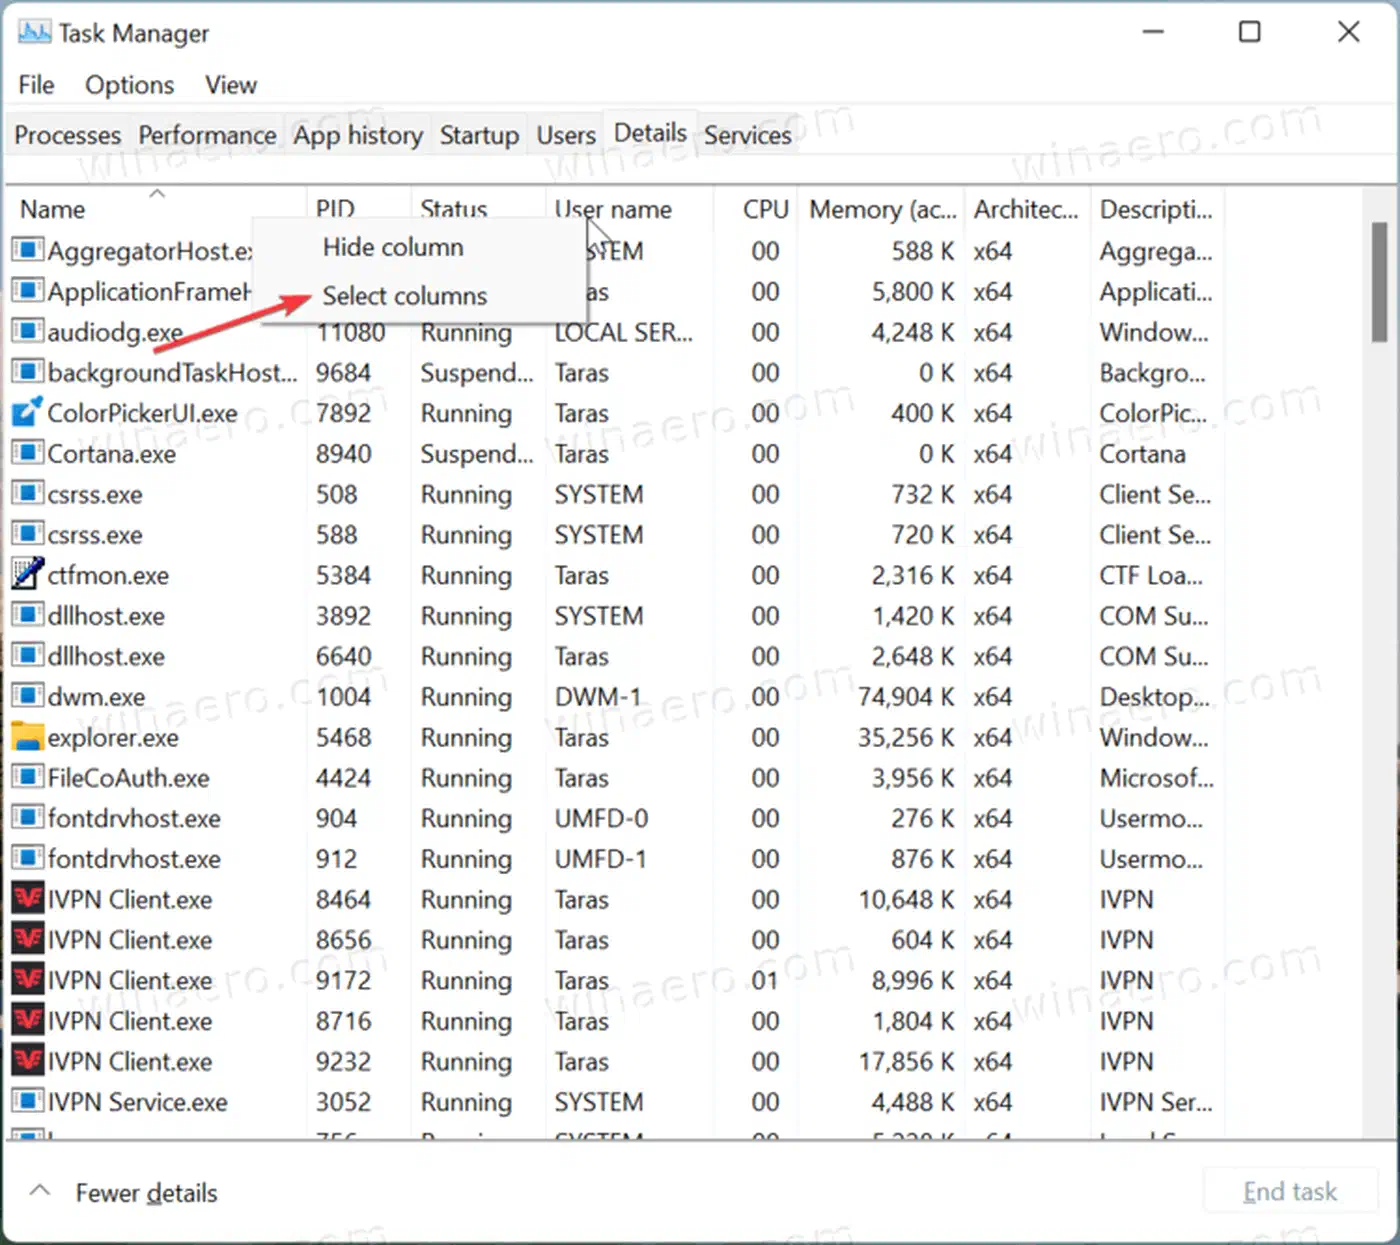
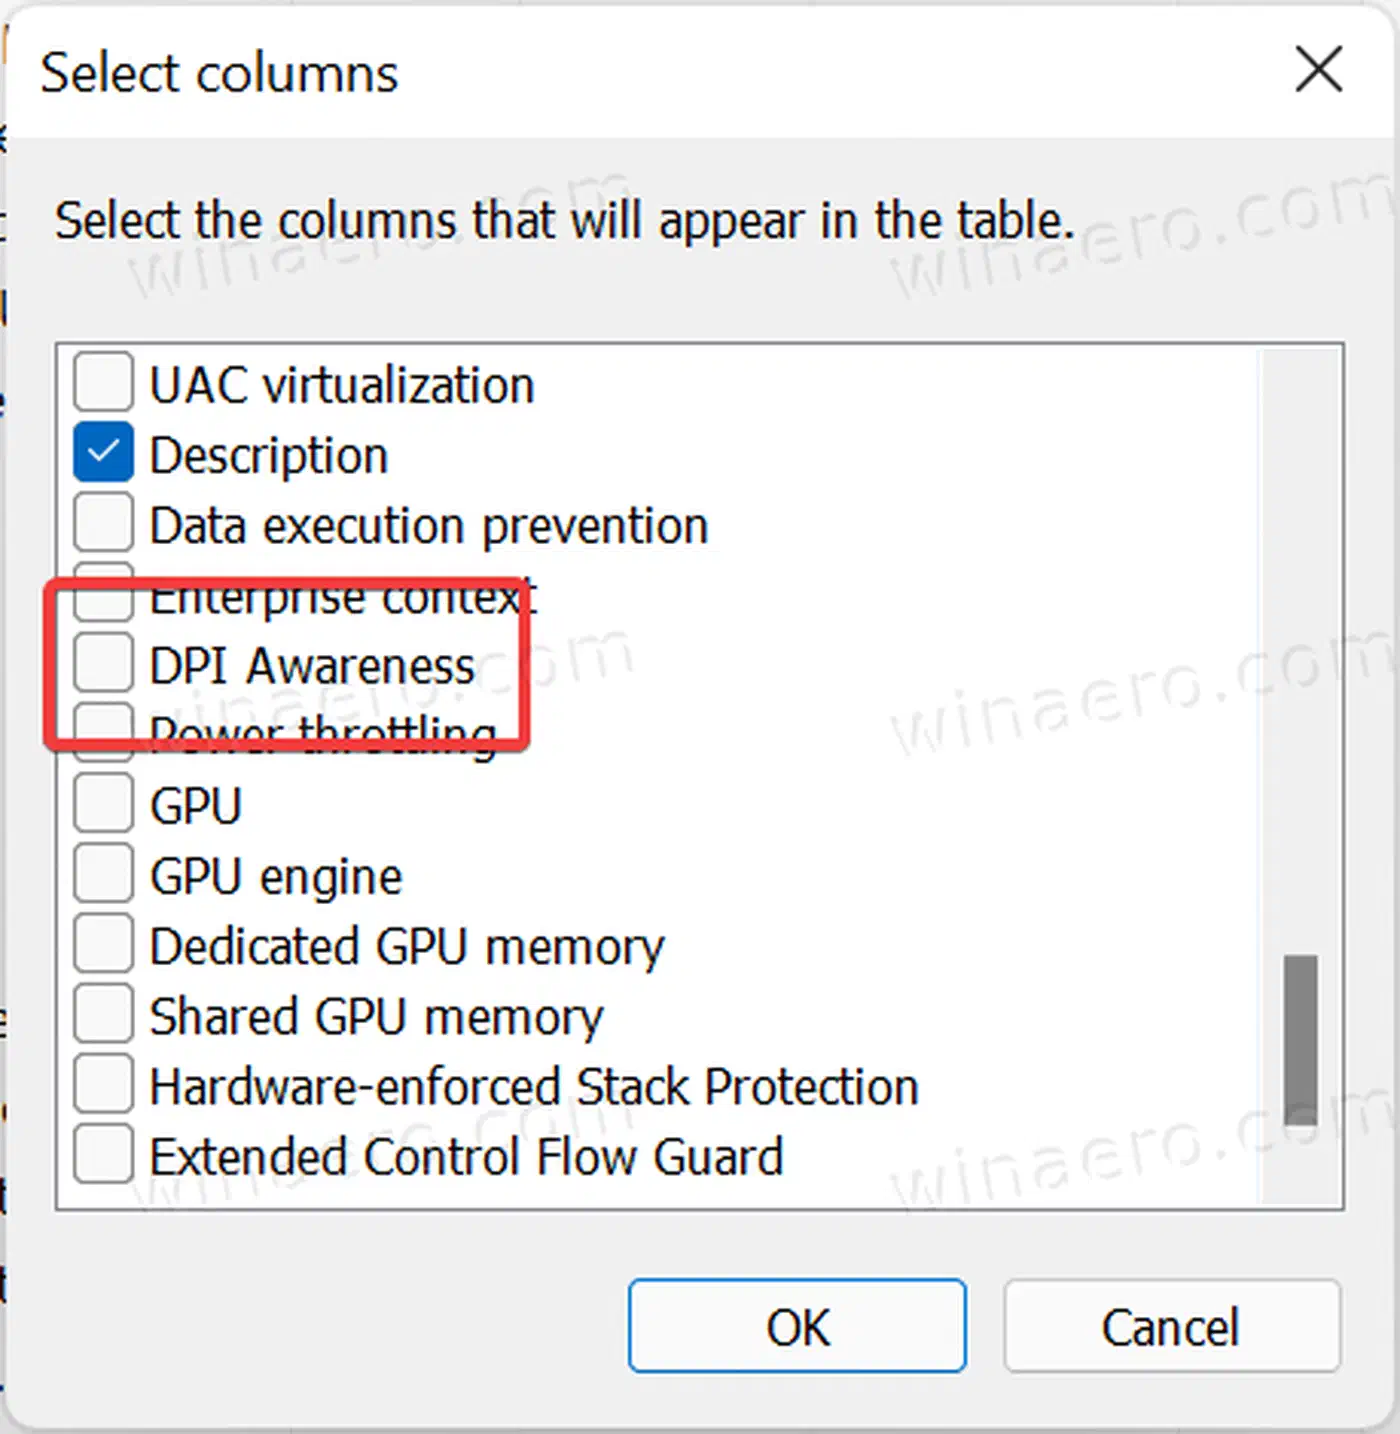
Press Ctrl+Shift+Esc, go to the Details tab, right-click any column header and choose Select columns. Tick DPI Awareness and click OK. The column then reports Unaware, System, Per-Monitor or Per-Monitor V2 for every process.
Note the mode for the app that looks wrong
Find your blurry app in the list and read its value. Unaware and System are the two that produce blur on a mixed-DPI desk. An app already listed as Per-Monitor V2 has a different problem, so stop here and look at the app’s own settings instead.
Reproduce the problem deliberately
Drag the window from one monitor to the other and back. Watch whether it goes soft on arrival or stays soft the whole time.
Open the executable’s compatibility settings
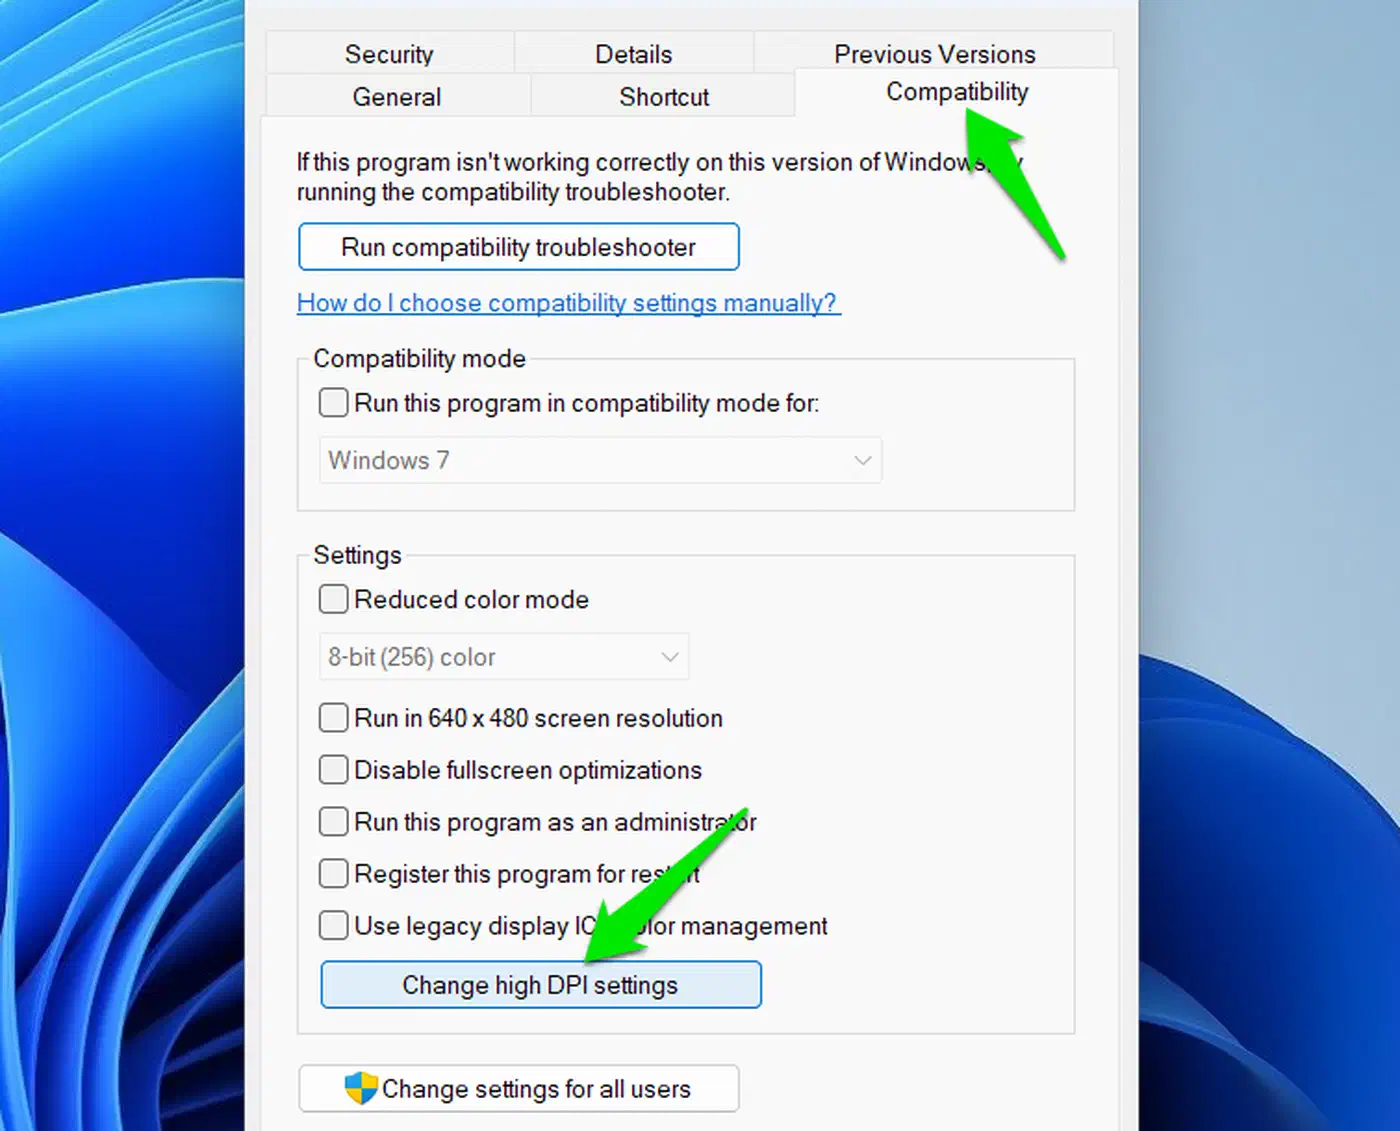
Right-click the app’s shortcut or its .exe, choose Properties, open the Compatibility tab, and click Change high DPI settings.
Apply the right override
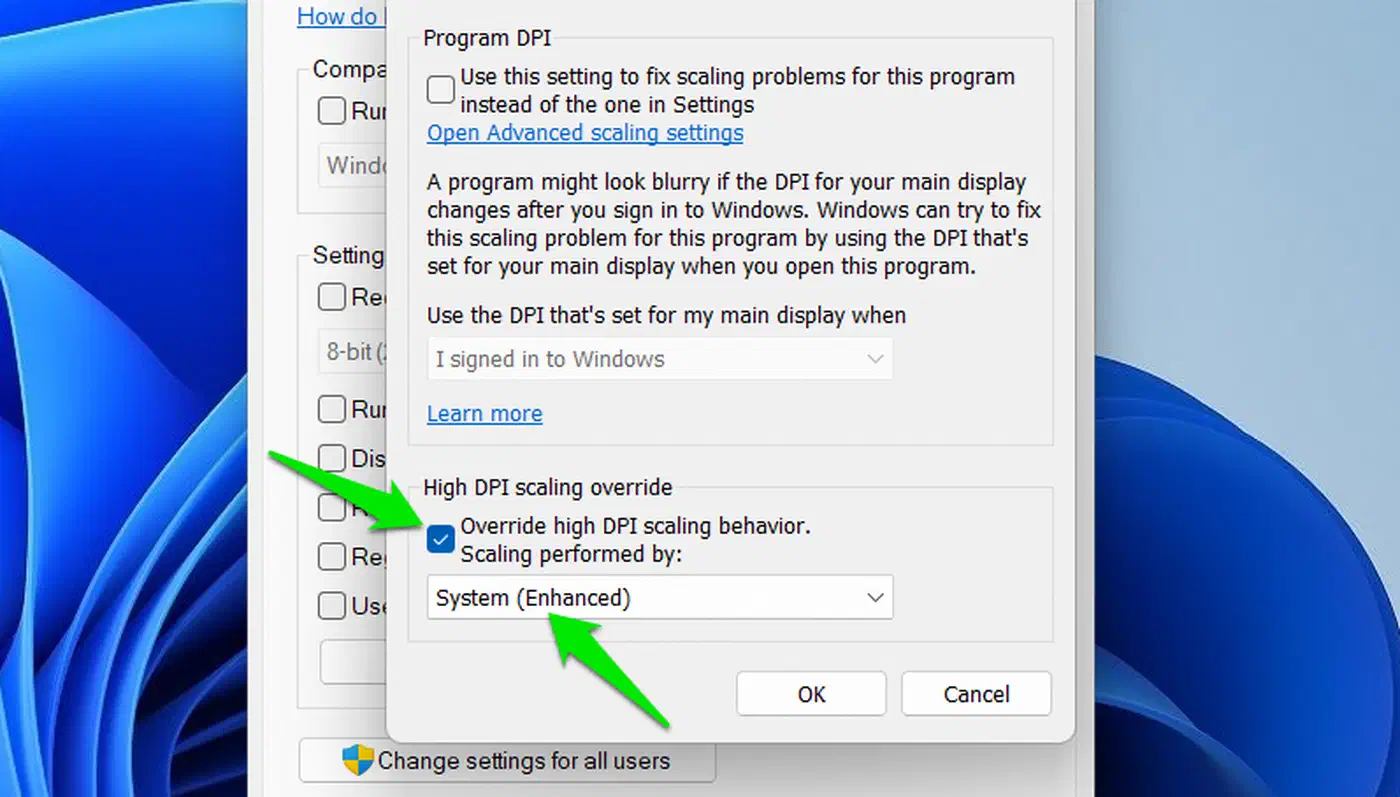
Tick Override high DPI scaling behaviour and pick one of Application, System, or System (Enhanced). Application hands scaling back to the app and stops Windows stretching it. System lets Windows stretch it, which is the blurry-but-correctly-sized option. System (Enhanced) asks Windows to re-render text and some primitives at the higher DPI. It is the option most likely to sharpen an old app.
Restart the app and re-check
Close it fully, not just the window, and launch it again. Look at the Task Manager column a second time to confirm the mode changed, then repeat the drag test.
Decide whether to fix the desk instead
If no override gives you a sharp result, the app is drawing at 96 DPI and no setting will invent extra pixels. At that point the monitors themselves are the remaining variable.
Why the “fix blurry apps” setting is only a patch
The setting called “Let Windows try to fix apps so they’re not blurry” is a compatibility shim sitting on top of the awareness flag. It watches for apps that have gone soft after a DPI change and re-scales or re-launches them so the geometry lands correctly. It never changes how the app renders.
For a system-aware app that is merely sized wrong after you swapped monitors, the shim often produces a better window. For a DPI-unaware app there is nothing to recover. The source bitmap holds 96 DPI worth of detail, and stretching it more carefully still stretches it.
Balfour describes the side effect as a kind of roulette. Apps flip between sharp and blurry depending on focus, launch order, or whether you signed out recently. Leave it on if your daily apps are system-aware and mostly well behaved. Turn it off if windows have started changing appearance for no reason you can name.
Choose monitors that scale together
A buying decision solves this better than any settings decision. When both panels want the same scale factor, every window keeps one DPI for its entire life. System-aware apps then never hit the mode they handle badly, and per-monitor support stops being something you depend on.
Work out each panel’s density first. Divide the horizontal pixel count by the diagonal in inches times 0.8716, and you get pixels per inch on a 16:9 screen. A 27-inch 4K panel gives 3840 / (27 x 0.8716) = 163 PPI. Divide that by 96 and you have the scale factor that would make everything physically the same size as a classic 96 DPI desktop.
| Panel | PPI | Ideal scale | Windows step people pick |
|---|---|---|---|
| 24-inch 1920x1080 | 92 | 96% | 100% |
| 32-inch 2560x1440 | 92 | 96% | 100% |
| 42-inch 3840x2160 | 105 | 109% | 100% |
| 27-inch 2560x1440 | 109 | 113% | 100% |
| 32-inch 3840x2160 | 138 | 143% | 150% |
| 27-inch 3840x2160 | 163 | 170% | 150% or 175% |
A 24-inch 1080p screen next to a 32-inch 1440p screen is the cheapest matched desk there is, because both land on 100 percent. Two 27-inch 4K panels at 150 percent is the same idea at the sharp end. The pairing that always fights is a 27-inch 4K at 150 percent beside a 27-inch 1440p at 100 percent, which is also a very common desk.
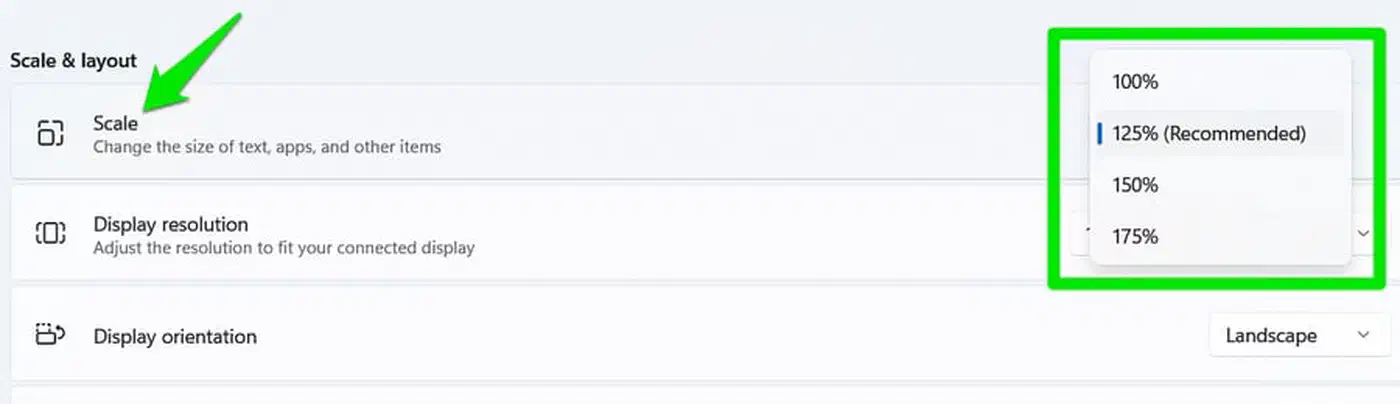
Laptops are the hard case, because the panel’s density is fixed and only the external screen is yours to choose. Modern 16:10 laptops sit high: a 16-inch 2560x1600 works out near 189 PPI, which is roughly 200 percent. Pairing that with a 27-inch 4K external also set to 200 percent gives you one DPI across the desk. The cost is desktop space on the big screen, since everything on it gets larger.
Linux readers hitting the same blur are looking at a different mechanism. There the compositor decides the scale, so Wayland fractional scaling behaves nothing like this and none of the Windows fixes above apply.